A navel piercing (also known as a belly button piercing) is one of the most popular body modifications in Istanbul. This navel piercing aftercare guide covers everything you need to know about the healing timeline, daily cleaning routine and common problems. For other placements, see our complete piercing healing times guide or visit the Bosphorus Ink piercing services page to book or browse our gallery an appointment.
Why Navel Piercing Requires Special Aftercare
The navel piercing is one of the most popular body modifications in the world — and one of the most prone to complications when aftercare is neglected. The anatomy of the area explains why: the navel sits in a zone of constant movement, persistent clothing contact, and regular exposure to friction and moisture.
These conditions make the navel one of the longest-healing piercing placements on the body, and one of the most sensitive to aftercare mistakes. Done correctly, healing is very manageable. Done carelessly, the same piercing can lead to infection, migration or rejection. The difference almost always comes down to the first few months of aftercare.
At Bosphorus Ink, the team walks every client through a full aftercare briefing before they leave the studio. This article sets out everything you need to know.
The Piercing Procedure: What to Expect
In a professional studio, the navel piercing is performed using a single-use sterile hollow needle. The area is first cleaned with antiseptic solution; the entry and exit points are marked, the skin is held steady with a clamp and the needle is passed through in a single smooth movement. The jewellery follows immediately behind.
The whole process takes only a few minutes. During the procedure, most people experience a sharp pressure sensation — brief, localised and very short in duration. Immediately after, some redness, minor swelling and a small amount of fluid are completely normal and will settle within a few days.
The material of the initial jewellery has a direct impact on healing. Implant-grade titanium (ASTM F136), nickel-free surgical steel (316L) and solid gold (14 karat or above) are the primary safe options for first piercings. Cheap alloys containing nickel can trigger allergic reactions and prolonged healing difficulties.
The Healing Timeline: What Happens When
The navel is one of the slowest-healing piercing placements on the body. A realistic understanding of the timeline prevents many common mistakes.
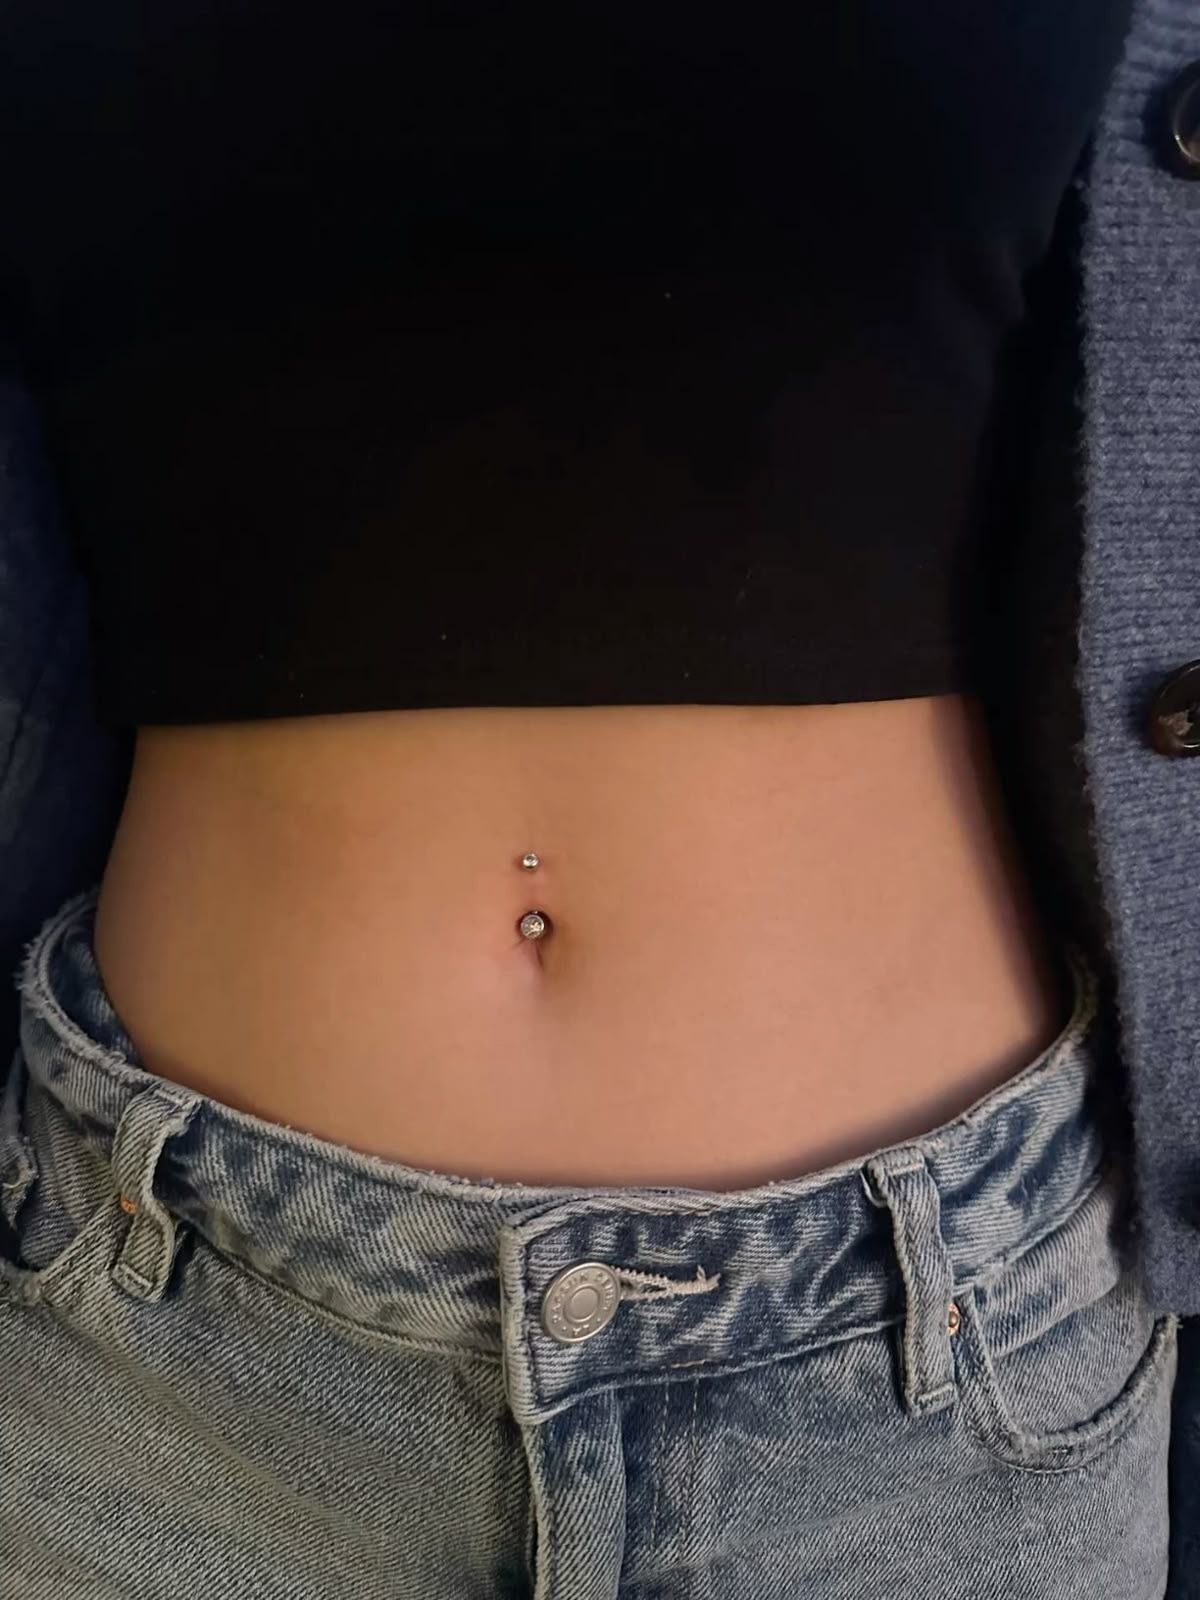
Weeks 1–4 (Acute phase)
Redness, swelling, mild tenderness and a clear or pale yellow fluid are all normal signs of the immune response at work. Some crusting around the jewellery is also expected. None of these indicate infection on their own.
Months 1–3 (Active healing)
Visible signs reduce significantly. However, the channel is still forming. Changing or removing the jewellery at this stage can restart the healing process from scratch.
Months 3–6 (Maturation)
The channel strengthens progressively. Many people assume they are healed because the surface looks clear — but healing happens from the inside out. Surface appearance is not a reliable indicator of internal healing progress.
Months 6–12 (Full healing)
Complete healing typically requires 6 to 12 months. In some individuals, depending on anatomy and aftercare quality, it can extend to a full year or slightly beyond.
Daily Aftercare Routine: Step by Step
Twice daily is the correct frequency. Over-cleaning is as problematic as under-cleaning — it removes the natural moisture that supports tissue repair.
Step 1 — Wash your hands
Always wash hands thoroughly with soap and water for at least 20 seconds before touching the piercing. This single step eliminates the most common source of piercing infections.
Step 2 — Use sterile saline solution
A ready-to-use sterile saline wound wash (0.9% sodium chloride) is the gold standard. If preparing at home, dissolve one quarter of a teaspoon of non-iodised sea salt in one cup of warm, previously boiled or bottled water. Do not use tap water — the chlorine content can irritate the healing tissue.
Step 3 — Clean the area
Using a clean gauze pad or cotton swab soaked in saline, gently clean both entry and exit points. Do not force away any crusts — let the saline soften them first.
Step 4 — Pat dry
Dry the area with a single-use paper towel. Cloth towels harbour bacteria and can snag on jewellery.
Step 5 — Do not rotate the jewellery
The once-common advice to "twist the ring" during cleaning has been thoroughly debunked by the professional piercing community. Rotating the jewellery disrupts the forming tissue bridge and slows healing.
What to Avoid During Healing
Alcohol and hydrogen peroxide: Both are too harsh for a healing piercing. They kill not only bacteria but also the new cells being generated to close the channel, significantly slowing the process.
Body lotion, perfume and soap residue: Keep chemical products well away from the piercing site. They can block the channel and cause chronic irritation.
Swimming pools, the sea and hot tubs: Avoid these for the first 4–6 weeks at minimum. Pool chlorine, ocean bacteria and the warm bacterial environment of a hot tub all pose infection risks to an open healing channel.
High-waisted and tight clothing: Clothing that presses against or rubs the piercing site creates mechanical irritation and can trigger the formation of a piercing bump — a common but avoidable complication.
Touching, twisting or playing with the jewellery: Minimise all unnecessary contact, especially in the first three to four months. Every touch introduces bacteria and disrupts tissue formation.
Direct sun and sunbeds: Healing skin is more sensitive to UV radiation. Keep the area covered when in direct sunlight.
Common Problems and How to Resolve Them
Navel piercing bump: A small raised lump around the jewellery is usually a sign of mechanical irritation, not infection. Loosen or change any clothing that presses on the area, reduce cleaning frequency to twice daily and apply saline directly. If it does not reduce within a few weeks, consult your piercer.
Crusting: A normal part of healing. Never forcibly remove crusts — soften them with saline first and wipe away gently.
Yellow-green malodorous discharge, spreading redness and fever: These are signs of a genuine infection. Do not remove the jewellery — a closed channel can trap the infection inside. Seek medical attention from a doctor or dermatologist promptly.
Migration and rejection: The body can gradually push the jewellery towards the surface. Thinning skin around the jewellery, increased visibility of the bar and persistent redness are warning signs. Contact your piercer — early intervention can sometimes prevent full rejection.
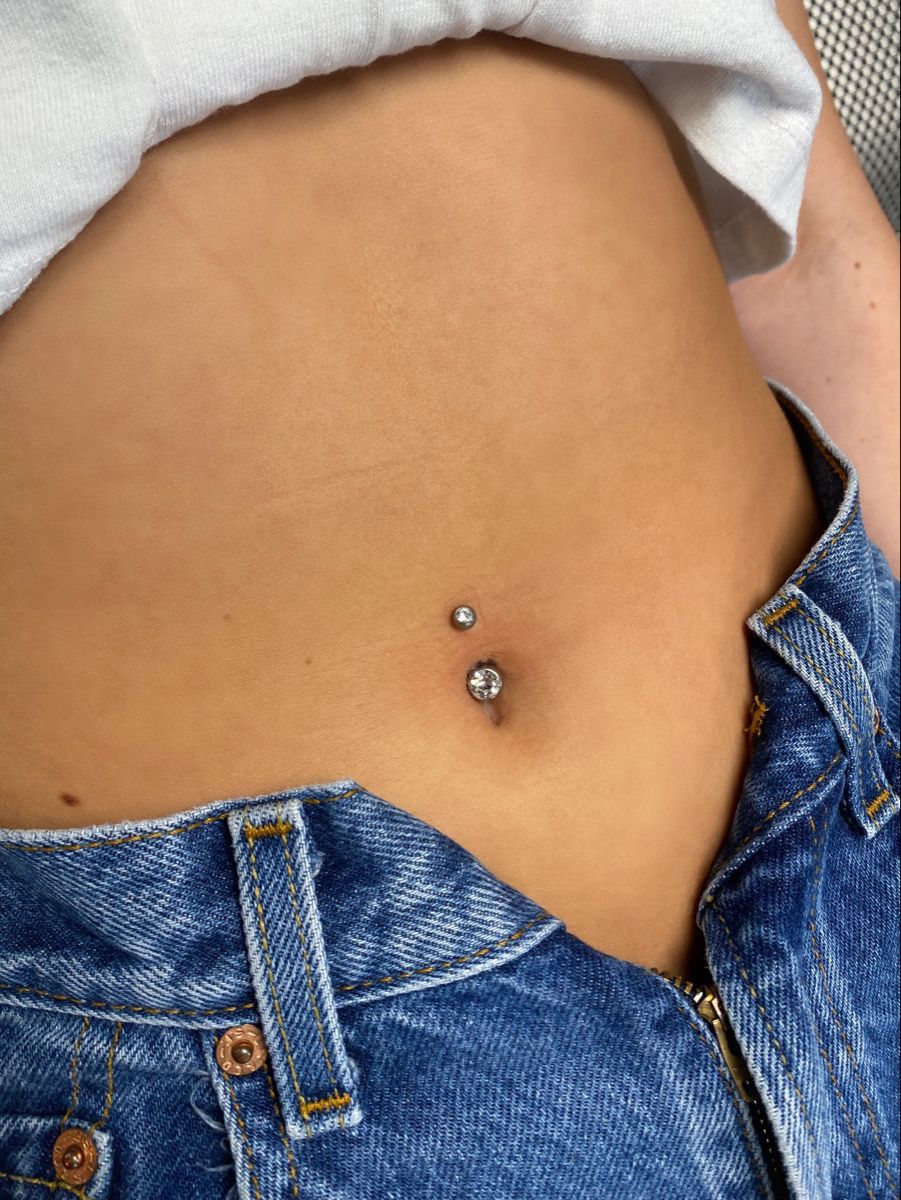
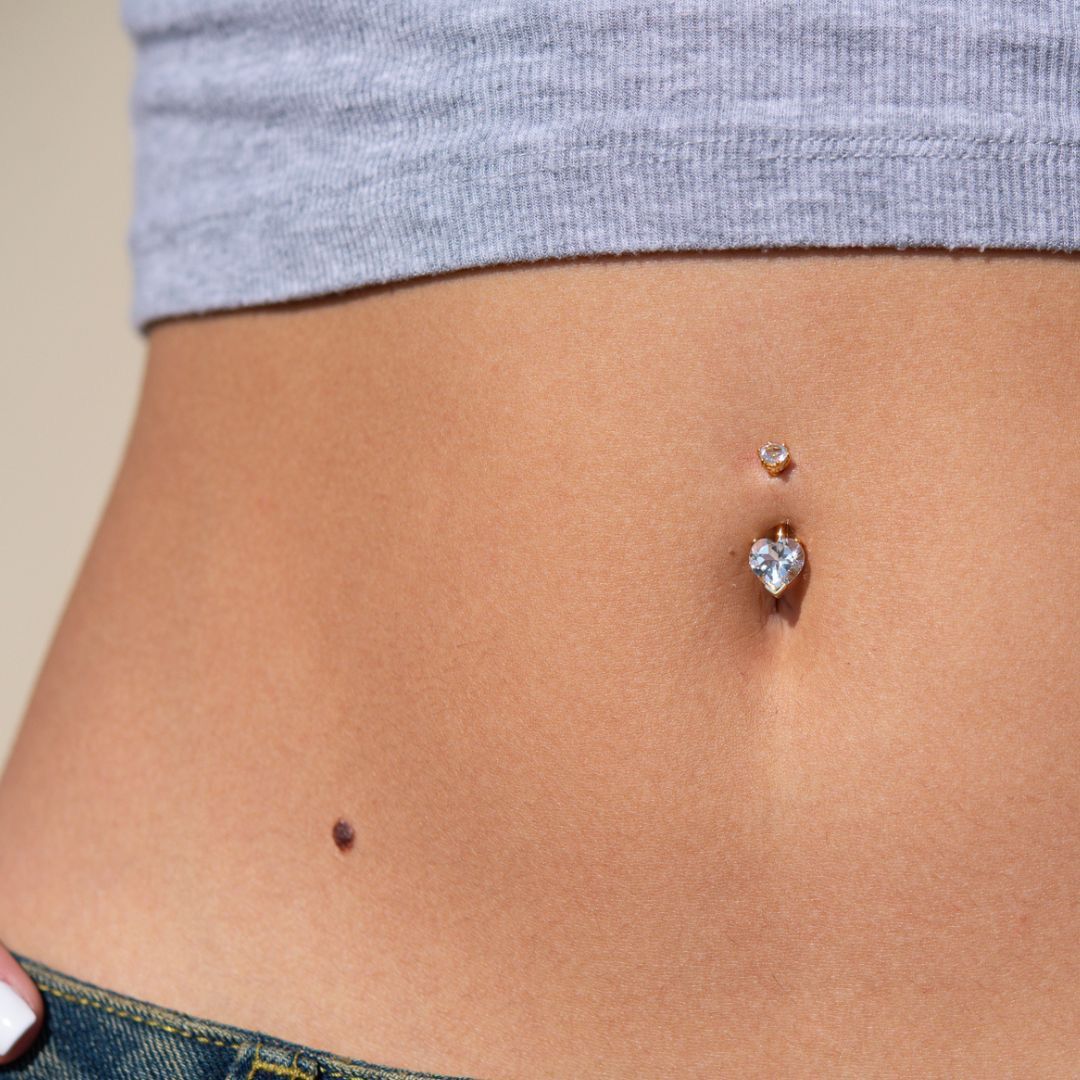
Jewellery Choice: A Direct Impact on Healing
The choice of initial navel piercing jewellery is one of the most influential factors in the healing process. At both Bosphorus Ink studios and our piercing specialists, only implant-grade titanium (ASTM F136) and nickel-free jewellery is used for new piercings.
Implant-grade titanium: Lightweight, hypoallergenic and highly biocompatible. It is the most widely recommended material for first piercings and is available in a range of anodised colours.
Nickel-free surgical steel (316L): A reliable and widely tested second option. Its highly polished surface supports smooth channel formation.
Solid gold (14 karat or above): Ideal for those with known metal sensitivities. Always verify it is solid gold, not plated — plated jewellery degrades over time, exposing the base metal.
Once healing is complete (6–12 months), the range of design and material options opens up considerably. Always have the first jewellery change done at the studio.
Navel Piercing at Bosphorus Ink
Navel piercing at Bosphorus Ink — with studios in Beşiktaş and Pendik Lens Yaşam Merkezi — is performed exclusively by experienced piercing specialists using single-use sterile equipment and implant-grade jewellery.
Every client receives a pre-procedure consultation to determine the most suitable jewellery type and placement for their anatomy, and a written aftercare guide to take away. The team is available for any questions or concerns throughout the healing process — contact us directly or visit our FAQ page anytime.
Frequently Asked Questions
How long does a navel piercing take to heal?
When can I change my navel piercing jewellery?
What should I do if my navel piercing gets infected?
Can I go swimming with a new navel piercing?
What is the best material for a first navel piercing?
Does a navel piercing hurt?